By Alex Kozora
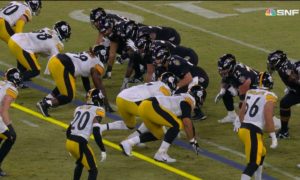
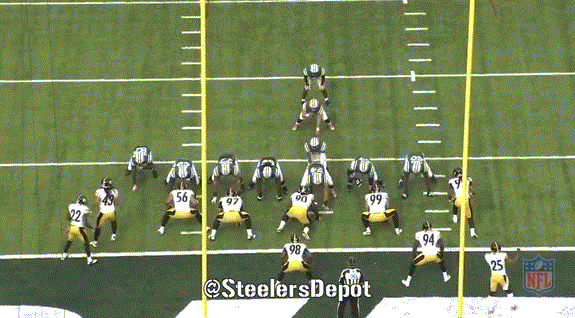
Breakdown of all defensive snaps from Pittsburgh Steelers defensive end Cameron Heyward against the New York Jets.
CLICK ON ANY PICTURE TO ENLARGE
First Drive
Snaps: 5
Run: 4
Rush/Drop: 1/0
Play-by-Play
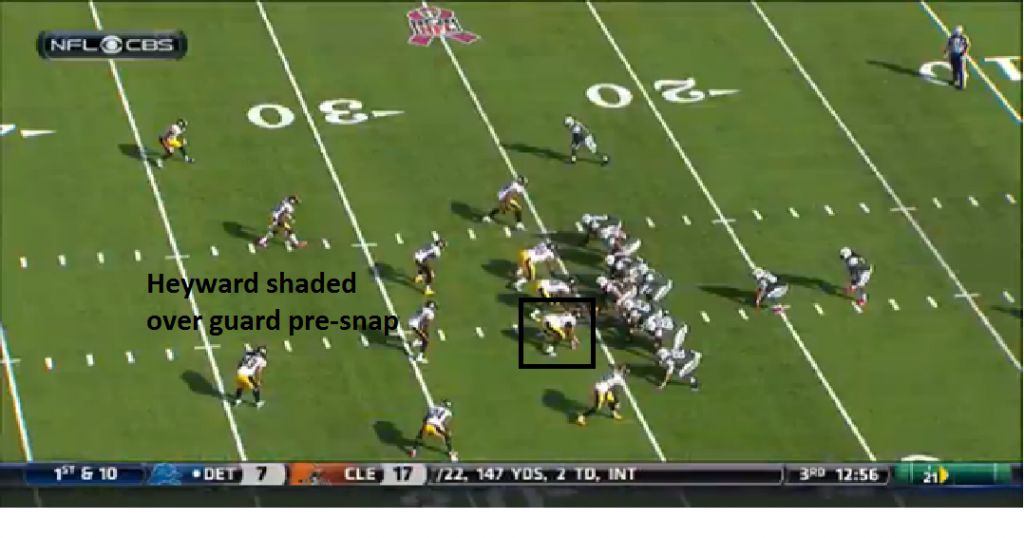
1. 1st and 10, 13:21 1st. Started game at LE with the team in dime. Base blocked by the guard. Zone read with Geno Smith running away from Heyward.
2. 2nd and 1, 12:46. Double teamed. Run off left tackle.
3. 1st and 10, 12:14. Wildcat. Base blocked by RT Austin Howard.
4. 2nd and 9, 11:39. Base by RT. Starts to get sealed by Heyward nice job to shed and not get run out of the play, even though he didn’t make the tackle.
5. 3rd and 7, 10:57. Hand up standing over center. T/E stunt with Brett Keisel that works, allowing Heyward to run in free. Helps chase Geno Smith down from behind and contributes to the throw away.
Second Drive
Snaps: 8
Run: 5
Rush/Drop: 3/0
Play-by-Play
1. 1st and 10, 9:04 1st. Run left side away from Heyward. Not much to report.
2. 1st and 10, 8:20. Bubble screen to RB split out wide. Recognizes it quickly and good hustle to try to get to the ball. Doesn’t make tackle but shows athleticism/effort.
3. 1st and 10, 7:43. Base by RT. Good arm extension and strength (all goes hand in hand) to drive Howard back off the snap.
4. 2nd and 7, 7:03. Pre-snap lined up as three tech. Slants one gap over (to “C” gap) post-snap. Run is away from him.
5. 3rd and 5, 6:29. Rushes with hand up. Pass thrown quickly to the back in the flat.
6. 1st and 10, 5:45. Screen to WR. Nothing doing.
7. 2nd and 6, 5:05. Based by Willie Colon who wins that battle.
8. 3rd and 1, 4:25. Heyward great job to shed, make tackle on goalline stand. Great play to do all that in such a short time in a space even more confined than usual.
Third Drive
Snaps: 4
Run: 1
Rush/Drop: 2/1
Play-by-Play
1. 1st and 10, 12:07 2nd. Playaction. Three man rush. Not much happening.
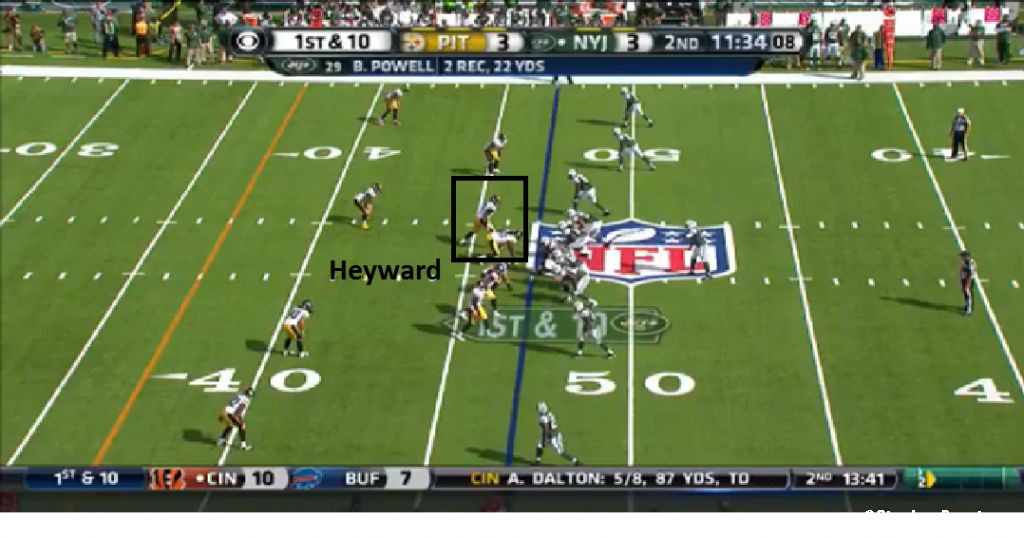
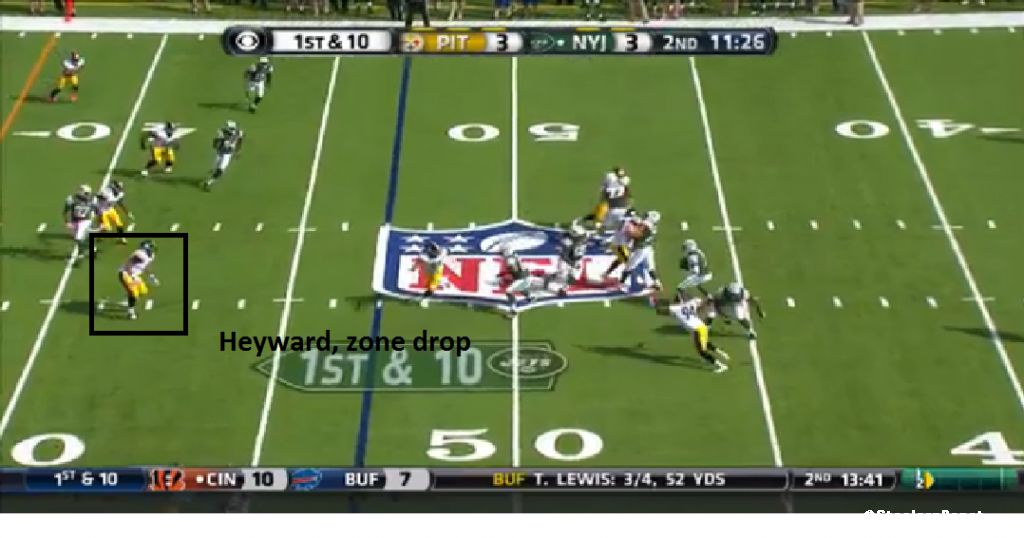
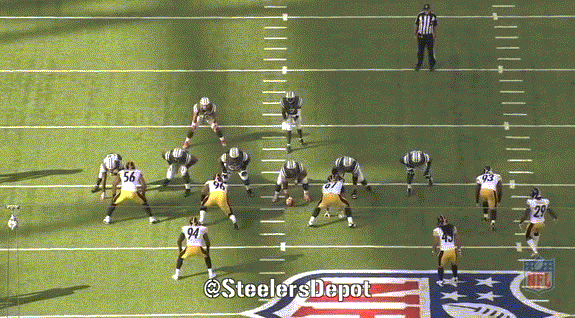
2. 1st and 10, 11:27. Hand up, EMOL with LaMarr Woodley covering slot. Drops into coverage in middle zone post-snap. Pictures pre/post snap below.
3. 2nd and 10, 11:20. Based by RT on end around away from him.
4. 3rd and 8, 10:41. Solo blocked by Nick Mangold on stunt. LaMarr Woodley, not a part of the stunt, records the sack pretty quickly so we don’t’ get to watch the stunt develop too much.
Fourth Drive
Snaps: 6
Run: 1
Rush/Drop: 5/0
Play-by-Play
1. 1st and 10, :40 2nd. Mangold sticks initially but the DE falls off as Mike Goodson flies past to help make tackle. Sound two-gap responsibility.
2. 2nd and 4, :31. RE with hand up. Rushes “A” gap, doubled by C/G.
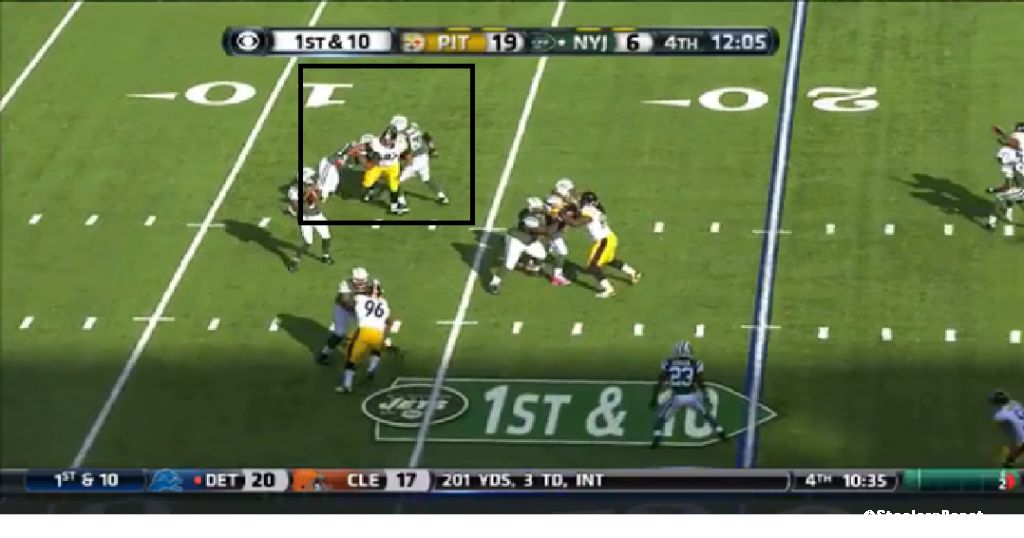
3. 3rd and 4, :26. Rush. Good initial punch vs D’Brickashaw Ferguson, knocking him off balance. Left tackle is able to recover and doesn’t let himself to get completely run into the pocket but Heyward showed his power, getting the better of a solid left tackle.

4. 1st and 10, :19. Left end. Hand up. Bull rush. Ball comes out quick, not much to say.
5. 2nd and 2, :15. RE. Rush. Nothing doing in brief moment vs LG Brian Winters.
6. 1st and 10, :11. RE. Good leverage, getting under Mangold’s pads and driving him into the pocket. No pressure, however.
Fifth Drive
Snaps: 3
Run: 0
Rush/Drop: 3/0
Play-by-Play
1. 1st and 10, 14:55 3rd. RE. Rush. Ball out quickly on curl.
2. 2nd and 10, 14:52. RE with hand up. Allowed to burst through the line on bubble screen but no impact/pressure.
3. 3rd and 6, 14:15. RE with hand up. C/RG double him.
Sixth Drive
Snaps: 8
Run: 4
Rush/Drop: 4/0
Play-by-Play
1. 1st and 10, 12:24 3rd. RE. Good arm extension, able to get off block though not involved in the play.
2. 2nd and 9, 11:46. RE. Rush. Lines up over guard, slants a gap outside, rushing vs LT. Proper hand placement, good leverage on the play.

3. 1st and 10, 11:04. Run away from Heyward. Doesn’t make an impact on the play but doesn’t let himself get swallowed up and gets off block. Just gets caught up in a swarm of bodies and can’t try and make a play on this run.
4. 2nd and 4, 10:30. Rush. Smartly gets his hands up but doesn’t knock the pass down.
5. 1st and 10, 9:58. Run right tackle away from Heyward, who was base blocked on the play.
6. 2nd and 5, 9:21. Mangold with a down block on Power O with LG pulling.
7. 3rd and 3, 8:41. Hard to tell what exactly happened but loses balance off the snap and falls to the ground.
8. 1st and 10, 8:01. Rush from RE spot. Just a four man rush so doubled by LT/LG.
Seventh Drive
Snaps: 3
Run: 1
Rush/Drop: 2/0
Play-by-Play
1. 1st and 10, 5:36 3rd. Screen away from him. Not much doing on this play.
2. 2nd and 12, 5:01. Run away but he has trouble getting off the block of LG Brian Winters.
3. 3rd and 14, 4:28. Initially bull rushes Mangold but then tries to swim. Ends up falling, might have tripped over the center’s foot.
Eighth Drive
Snaps: 6
Run: 1
Rush/Drop: 5/0
Play-by-Play
1. 1st and 10, 12:09 4th. Slow rush, almost contain principles. Smith with all day to throw. Heyward catches LT/LG napping, splitting the two and getting pressure late in the play.
2. 1st and 10, 11:37. Run. Base by LT. Not able to fall off in time and make the stop on the RB who runs past. Only a three yard gain though.
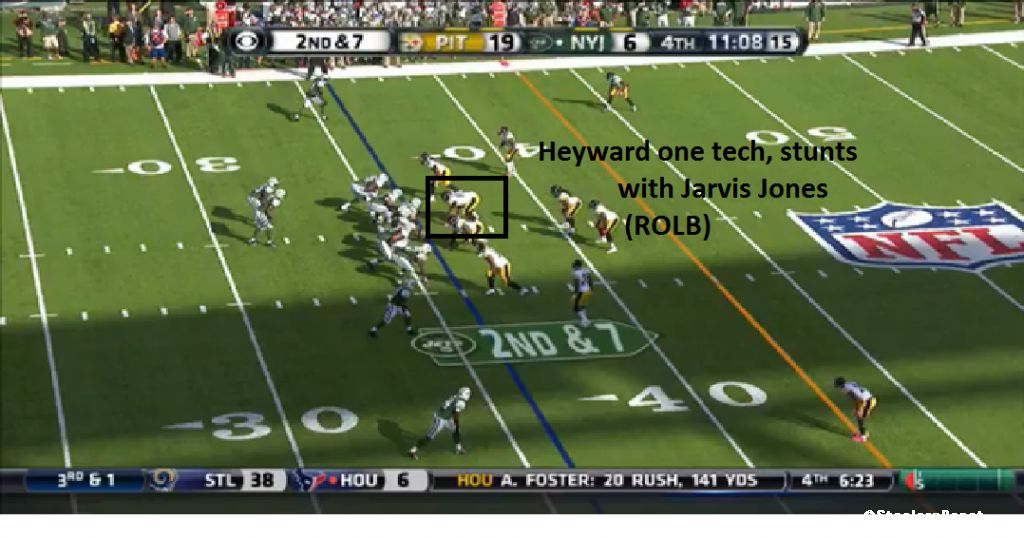
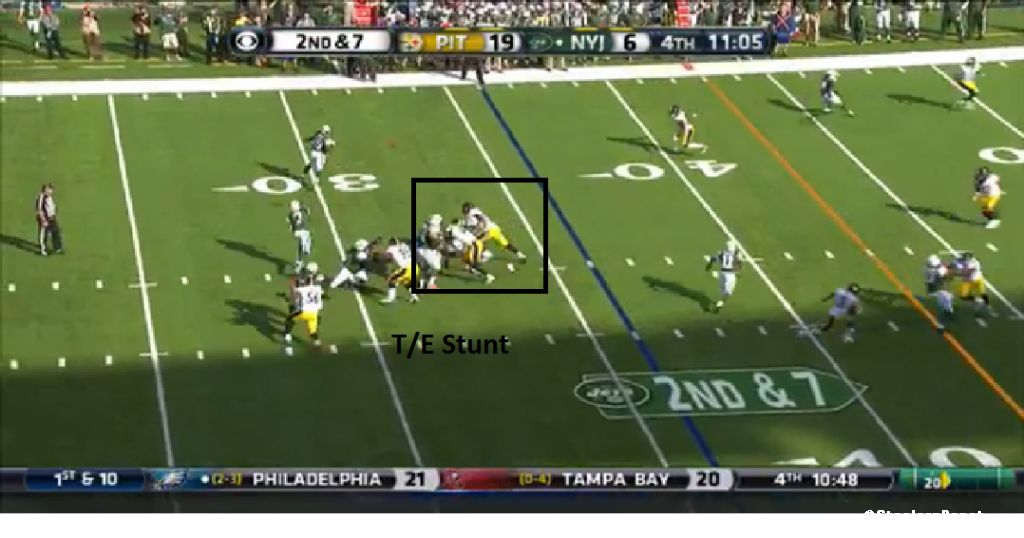
3. 2nd and 7, 11:07. Lined up as the one-tech. T/E stunt (pre-snap technique indicator of that)
4. 1st and 10, 10:41. Lined up as one tech again though no stunt, just a straight bull rush. Again, shows good arm extension and leverage.
5. 2nd and 10, 10:38. RE, rush with hand up. Initially stymied by Winters but able to slip past but does not generate pressure.
6. 3rd and 10, 10:33. Inside shade, outside rush again. Gets pushed upfield by the LT.
Ninth Drive
Snaps: 3
Run: 0
Rush/Drop: 3/0
Play-by-Play
1. 1st and 10, 7:52 4th. Double by C/G on pass rush.
2. 1st and 10, 7:27. Know it’s a screen so traditional OL technique can go out the window but gets the LG (away from screen) turned to the side. Winters is a rookie and Heyward schools him.
3. 2nd and 10, 7:28. Screen recognized/blown up by Heyward. Heady play.
4. 2nd and 20, 7:18. Screen again. Winters lets him blow through but Heyward able to pressure Smith and force him to throw the ball into the ground.
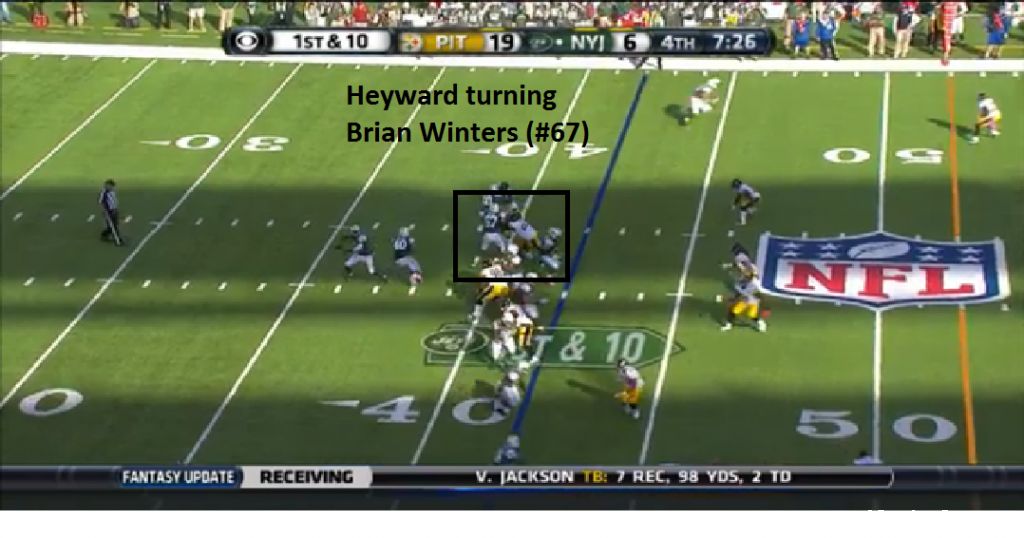
5. 3rd and 20, 7:15. Best pass rush of his of the day. Again, schooling Brian Winters. Walks him into the pocket with a powerful bull rush. Takes Smith down right after the throw. Excellent series from #97.
Tenth Drive
Snaps: 4
Run: 0
Rush/Drop: 4/0
Play-by-Play
1. 1st and 10, 4:49 4th. Doubled by C/G.
2. 2nd and 12, 4:21. Colon gets best of Heyward, anchors vs bullrush.
3. 1st and 10, 3:51. Same thing. Colon mirrors with ease.
4. 1st and 10, 3:08. RE. Initial bull then swim that looked effective, catching Ferguson off guard.
Eleventh Drive
Snaps: 1
Run: 0
Rush/Drop: 1/0
Play-by-Play
1. 1st and 10, :18 4th. Quick hands and sheds Winters, forcing Mangold to come over and help out.
Total/Conclusions
Snaps: 51
Run: 17
Rush/Drop: 33/1
He was a little less impactful than what I hoped but definitely had his moments and is clearly a better athlete and subsequently, better pass rusher than Ziggy Hood. With the team’s lack of pressure, there’s no question that is one of the reasons he was inserted into the starting lineup. Rushing with his hand up on 8/33 rushes (24%) is something Hood will never do.
And Heyward is no slouch against the run either. His stack/shed on the goalline was a potential game changer, holding the Jets to three and a great example of Heyward at his best.
Would like to see him add to his repertoire and use his quick hands more often. The swim was effective when used but want to see it more.
Although he lost a few battles towards the end of the game, I didn’t get the sense of him tiring out, one area I wanted to take a look at with him play 90% of the snaps, a big uptick from being in a rotation.