By Alex Kozora
A play-by-play breakdown of the snaps played by nose tackle Al Woods against the Cleveland Browns.
CLICK ON ANY PICTURE TO ENLARGE
First Drive
Snaps: 2
Run/Rush: 0/1
Play-by-Play
1. 1st and 10, 8:41 1st. LE in 34. Just three man rush. RT/TE block him
2. 1st and 10, 8:41. LE. False start on the tight end. Rotated out after that.
Second Drive
Snaps: 3
Run/Rush: 3/0
Play-by-Play
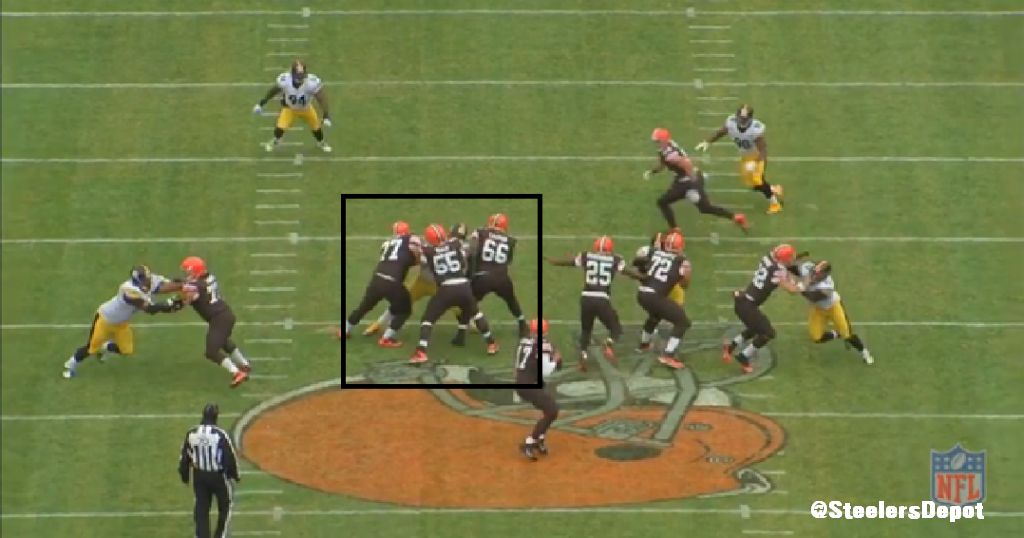
1. 1st and 10, 2:42 1st. Head up on the RT. Base blocked by him. Shows quick hands to shed and make the tackle on Willis McGahee. Swam over the top.
2. 2nd and 6, 2:01. LE, head up on the RT. Inside zone to the left away from Woods. Nothing doing in the play.
3. 1st and 10, :29. RE, slightly inside shade on left tackle Joe Thomas. Base blocked by him. Really nice play by Woods. Sheds with the RB trying to cut back, helps in on the tackle.

Third Drive
Snaps: 3
Run/Rush: 1/2
Play-by-Play
1. 1st and 10, 11:38 2nd. Nose tackle for the injured Steve McClendon. Run off left tackle. Combo block from LG/C. Nothing doing.
2. 1st and 10, 10:57. NT. Four man rush. Browns keep six in to block plus back on block/release. Center blocks him and both guards chip him.
3. 2n and 11, 9:17. NT. Screen so the center lets Woods through. Pressure from Jason Worilds forces Jason Campbell to throw the ball into the ground.
Fourth Drive
Snaps: 3
Run/Rush: 1/2
Play-by-Play
1. 1st and 10, 4:33 2nd. One step screen so nothing happening here.
2. 1st and 10, 4:08. NT. Run off left tackle. Base blocked by Alex Mack. Stalemate, good battle between the two.
3. 2nd and 6, 3:37. NT, one tech to the strong side. Playaction, Browns fake outside zone to the left that pulls Woods down the tracks.
Fifth Drive
Snaps: 1
Run/Rush: 0/1
Play-by-Play
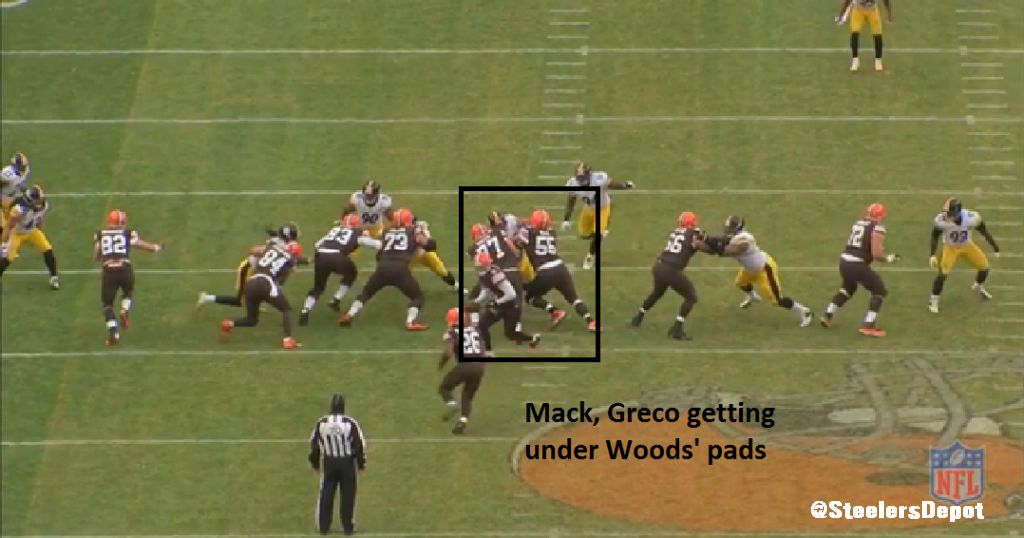
1. 1st and 10, 2:29 2nd. NT, 1 tech shaded to strong side. Pass. Good arm extension, pushes Mack back into the pocket until he gets chipped and knocked off balance by John Greco, the LG.
Sixth Drive
Snaps: 2
Run/Rush: 1/1
Play-by-Play
1st and 10, 15:00 3rd. Nose tackle. Run outside zone to the left. Fights off cut block. Good hustle to chase down the play and at the end, knocks Joe Thomas on his butt. Though to be fair, Thomas had just landed after leaping over a pile and probably didn’t see Woods coming.
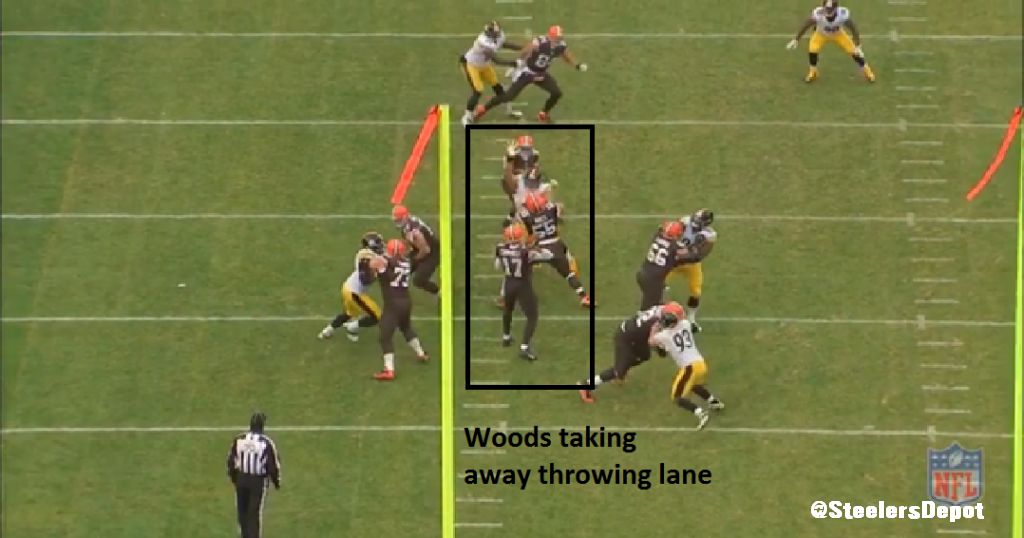
2. 2nd and 5, 14:26. NT. Stonewalled by Mack. But I really like him putting his hand up on this pass. Takes away the throwing lane as Campbell tries to check it down to the back. Pass ends up falling incomplete.
One of those plays that’ll never show up on the stat sheet but something Coach Mitchell loves.
Seventh Drive
Snaps: 2
Run/Rush: 1/1
Play-by-Play
1. 1st and 10, 9:34 3rd. Three man rush. Tripe teamed. Not a product of him being a huge threat but rather one of having the TE/RT on the one side and Joe Thomas on the other. Still, no chance for Woods to get pressure.

2. 2nd and 1, 9:22. Chipped by Greco and then base blocked by Mack. Center shows good leg drive, winning at the POA.
Eighth Drive
Snaps: 7
Run/Rush: 4/3
Play-by-Play
1. 1st and 10, 7:38 3rd. Toss right. Good hustle even though he wasn’t involved in play. Showed quickness and motor down the line.
2. 4th and 1, 6:29. One tech, left of the center. Doubled by LG/C on Brandon Weeden sneak. Tough to defend.
3. 1st and 10, 5:58. Three tech to the weakside. Mack absorbs his bullrush.
4. 1st and 10, 5:23. Over front, two DL in subpackage. Three tech. Doubled by C/RG.
5. 3rd and 1, 4:11. One tech to strong side. Chip by center, blocked by LG. They get under his pads and Greco pancakes him. Woods’ pad level too high.
6. 1st and 10, 2:53. Three tech to strong side playing at RE with two down lineman. Alex Mack down blocking on Power O. Really nice play by Woods to shed the block.

7. 2nd and 8, 2:30. RE as one of two down lineman. T/E twist, not much else happening.
Ninth Drive
Snaps: 1
Run/Rush: 0/1
Play-by-Play
1. 1st and 10, 6:54 4th. NT. Tries to bullrush, not much happening.
Tenth Drive
Snaps: 3
Run/Rush: 0/3
Play-by-Play
1. 1st and 10, 4:00 4th. LE on the drive. Quick throw, slants inside with Troy/Timmons blitzing over his pre-snap gap.
2. 1st and 10, 3:20. One tech. Good arm extension on bull rush.
3. 2nd and 10, 3:17. Three tech, between center and guard. Fade to Josh Gordon so ball comes out quick, nothing to report.
Eleventh Drive
Snaps: 5
Run/Rush: 0/5
Play-by-Play
1. 3rd an 10, 2:27 4th. Zero tech with two down lineman. One on one with Greco. Loses balance, seems to be overextended and falls.
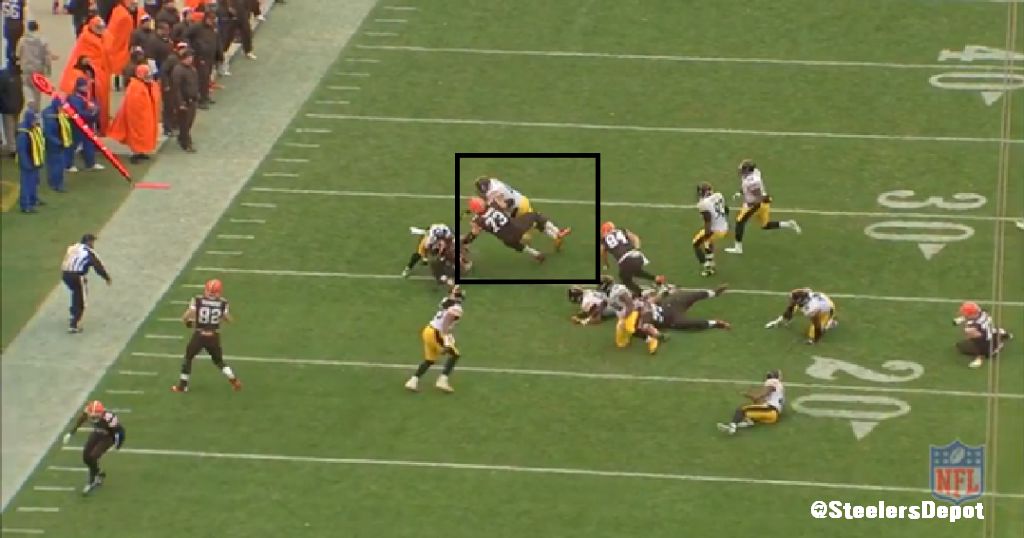
2. 1st and 10, 2:03. Head up over LG. Solo vs him. Sacks Weeden. Part a coverage sack but a great show of athleticism, to dive and bring the QB down.

3. 2nd and 10, 1:56. LE, five tech. Good arm extension but absorbed well by Joe Thomas.
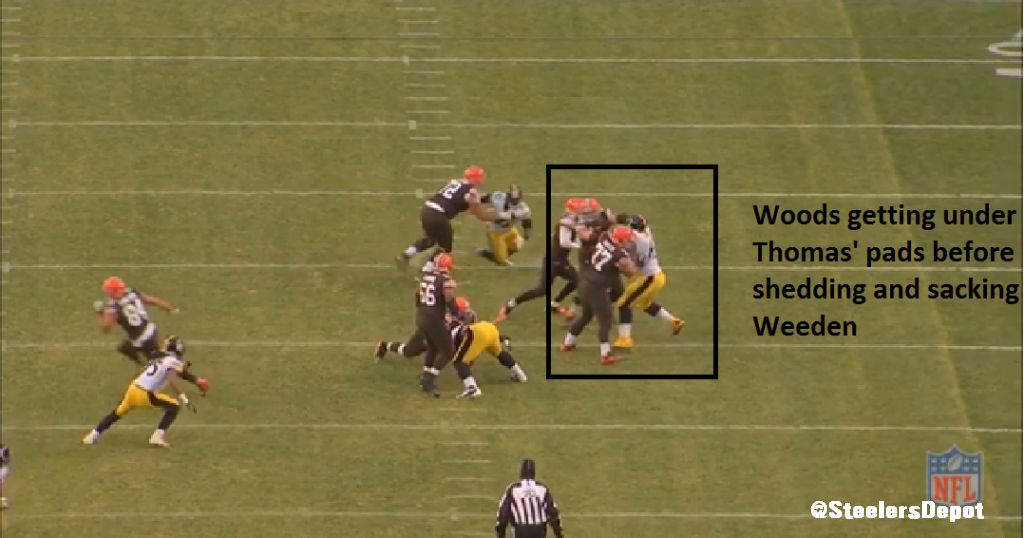
4. 3rd and 10, 1:51. Five tech, RE. Three man rush doubled by LT/LG. Able to get under Thomas’ pads. Get off the block (what winning the leverage battle allows you to do) and again drop Weeden. Another athletic play.
5. 4th and 6, 1:01. Five tech, RE. Thomas absorbs his rush.
Total/Conclusions
Snaps: 32
Run/Rush: 11/20
An encouraging game from Woods. Snaps were still inconsistent even if the season total was a season-high. He only played more than five snaps on one of his 11 drives. If the first Ravens game is any indication, Woods won’t see 35 snaps at nose tackle (McClendon just 14 at NT in first matchup, 17 overall) and we won’t have to see how he handles playing a heavy, consistent amount of snaps. He’ll probably log 5-6 snaps at DE as well Thursday.
He’s a quick-twitch athlete with a motor that doesn’t quit and sneaky quick hands who can get off blocks. Should fill in fine until McLendon is able to return. The big downside of the injury is the lack of depth along the defensive line now.